Designing and Piecing a Quilt Backing
When working on my latest quilt kit, I realised just how
much I love a pieced back!
I know there are more pretty extra-wide
backings available than ever before, but there's just something special about
using some of the same fabrics you've used on the front, on the back, and
sometimes, depending on the quilting, you can end up with two quilts in one!
However, when some people have seen my backs, they've stepped back in complete awe, as if I'd just scaled Kilamanjaro! Let me tell you folks, pieced backings are really not that difficult! Or should I say, they're only as difficult as you make them - with a little maths and some added creativity, you can make your quilt backs just as beautiful as your fronts!
Now, can I just say, if I'm working on a quilt which is a ridiculous size (it has been known), I would probably join two standard widths of a fabric used on the front, just to have continuity, but that's just me, maybe I've just never been fortunate enough to find that perfect extra wide fabric.
However, if I'm working on a quilt say 60"wide, I very often use just one length of 44" wide fabric, and add a panel to make up the difference. I know I could easily buy 5m of a fabric, cut into two 2½m drops and join, but with 60" I would have quite a lot of fabric left over, which seems a waste, so let me share with you some ideas I've come up with over the years...
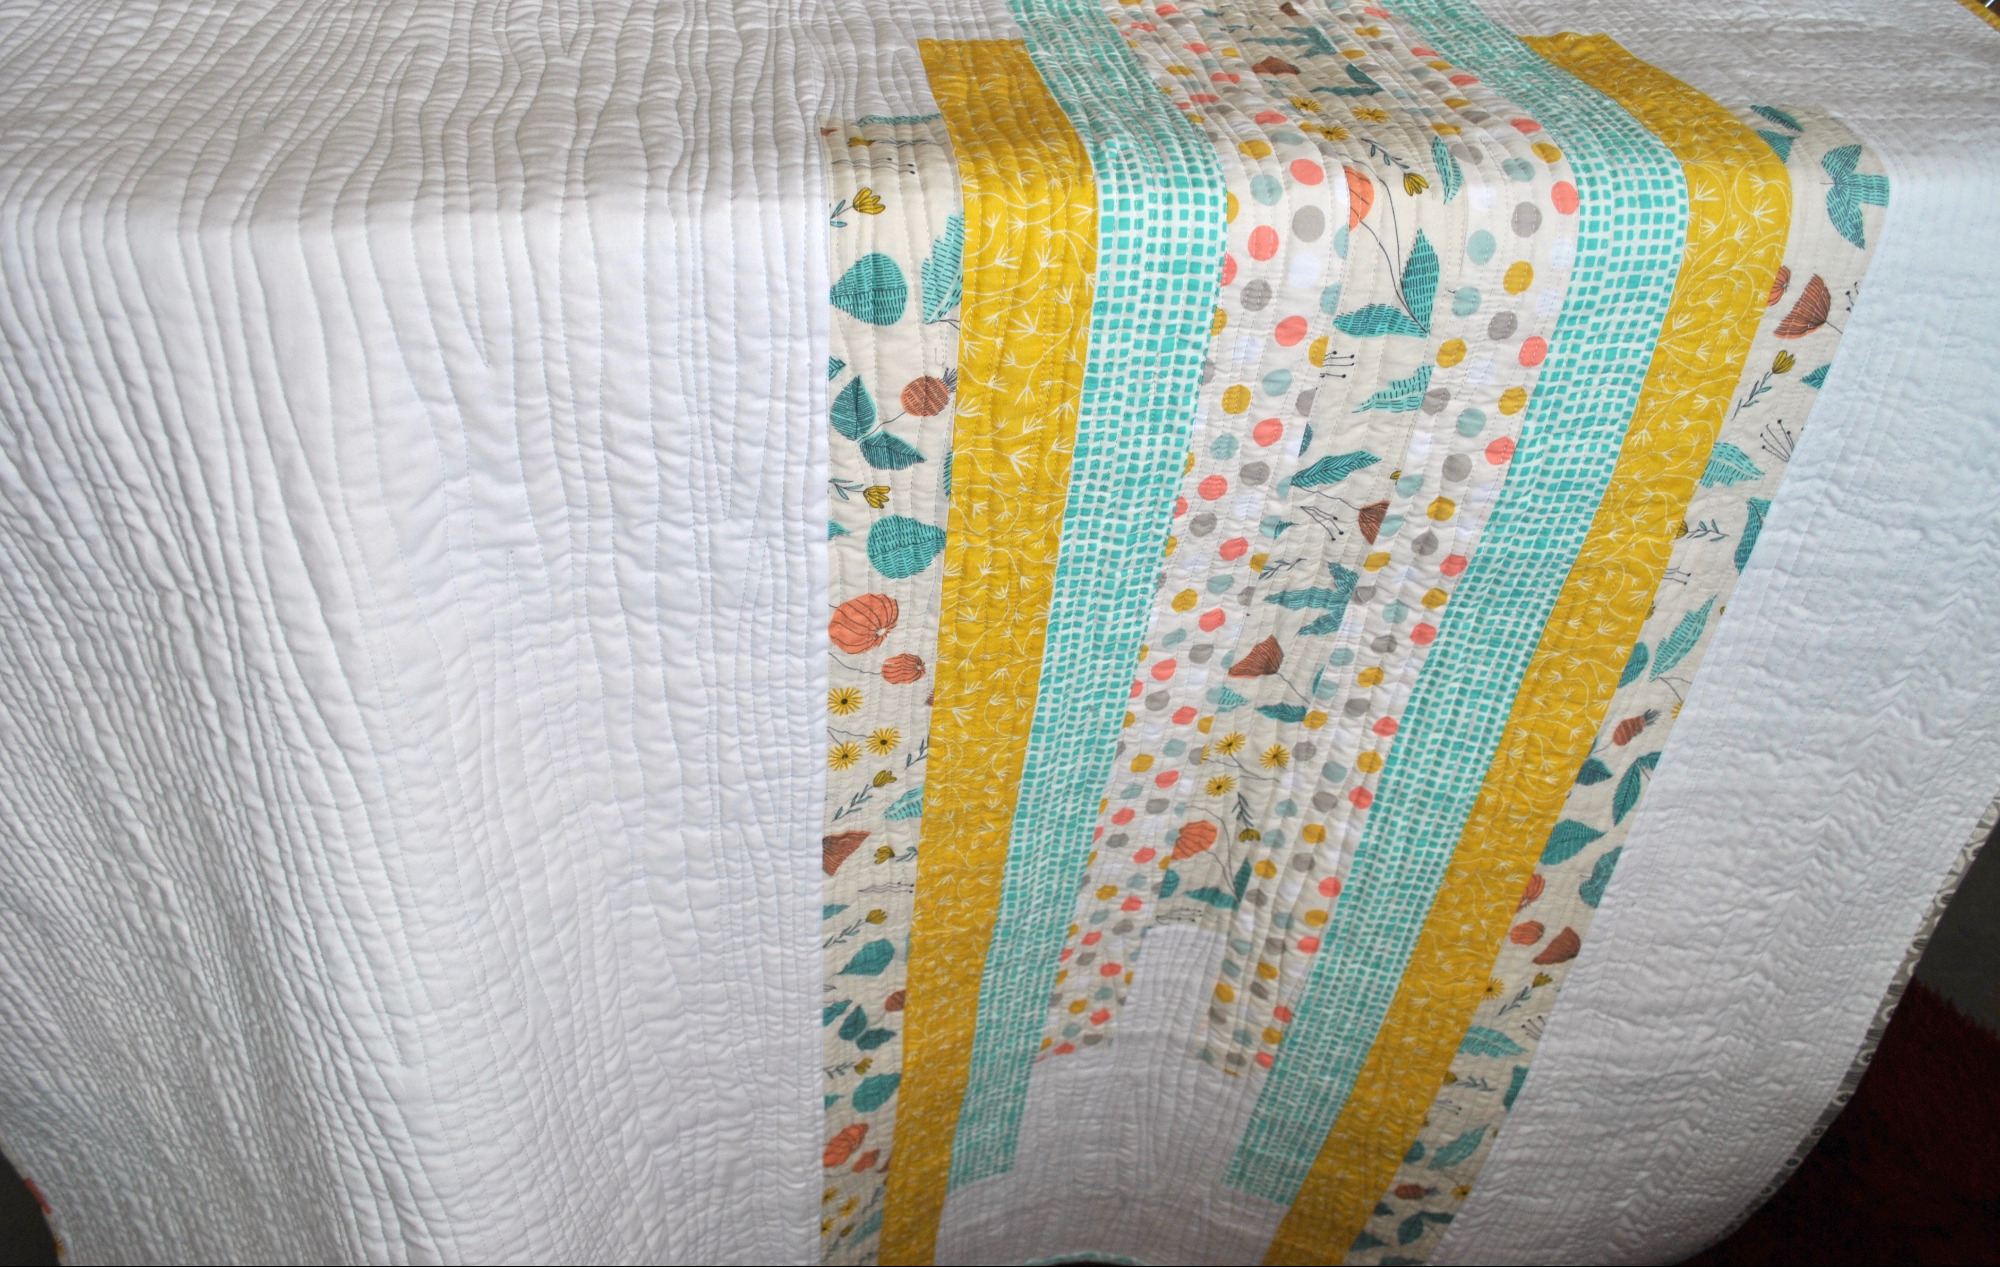
Perhaps one of the simplest backings I've created was to use left over jelly roll strips to make up the missing panel. Let me just say here, I never place the panel down the centre of the back, one reason being I like things off-centre, but the main reason is I don't have to worry about getting the back's centre lined up with the front! As long as the panel is straight, (which I have a trick for below) I'm perfectly happy!
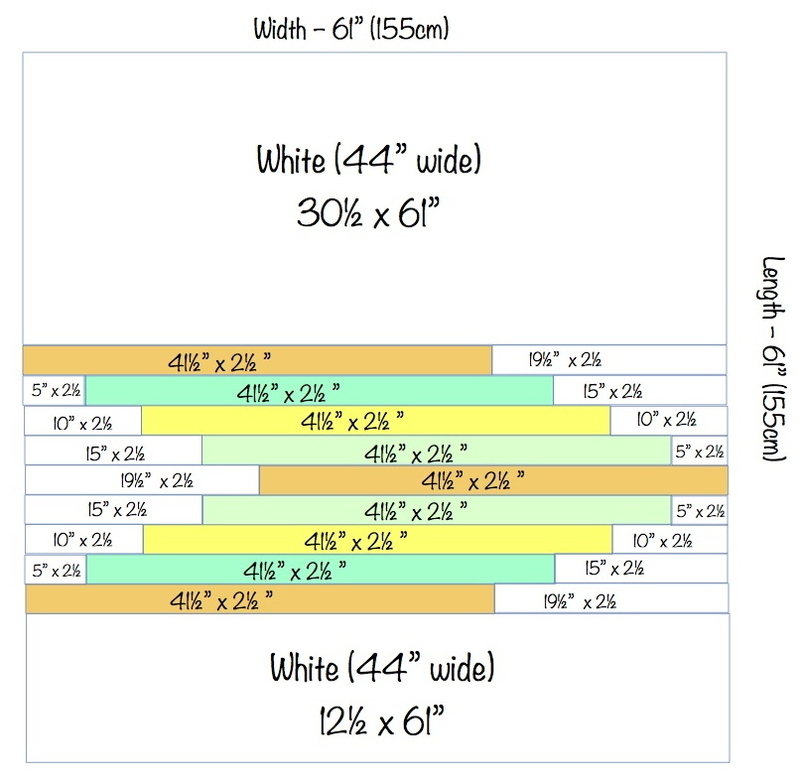
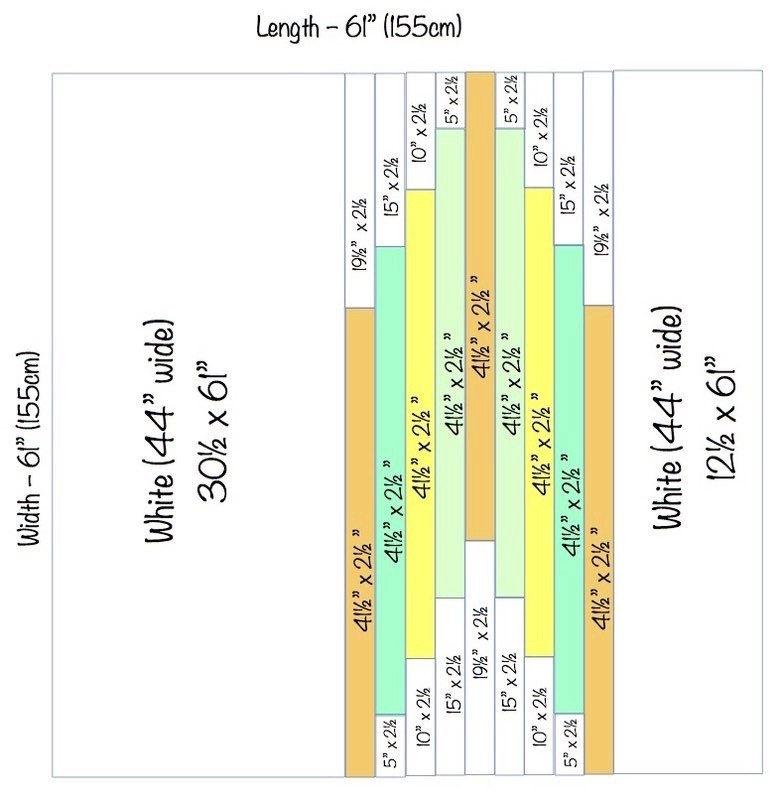
In my All Squared Up Quilt, this diagram shows how I worked out the measurements for the back. As this was a jelly roll quilt, I had 2½" lengths in patterned and white fabric left over, so I only had to buy 155cm more in the white for the main pieces.
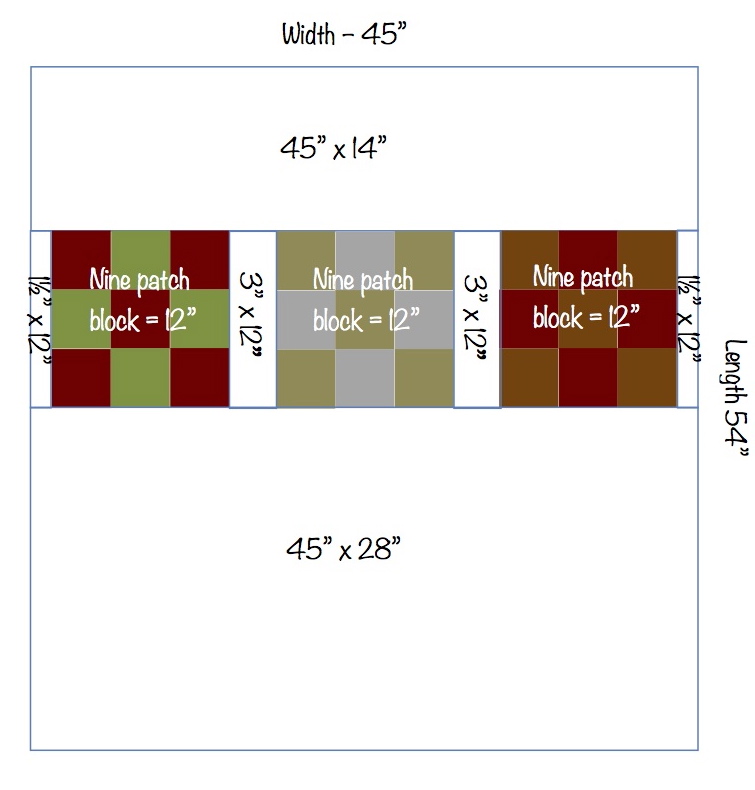
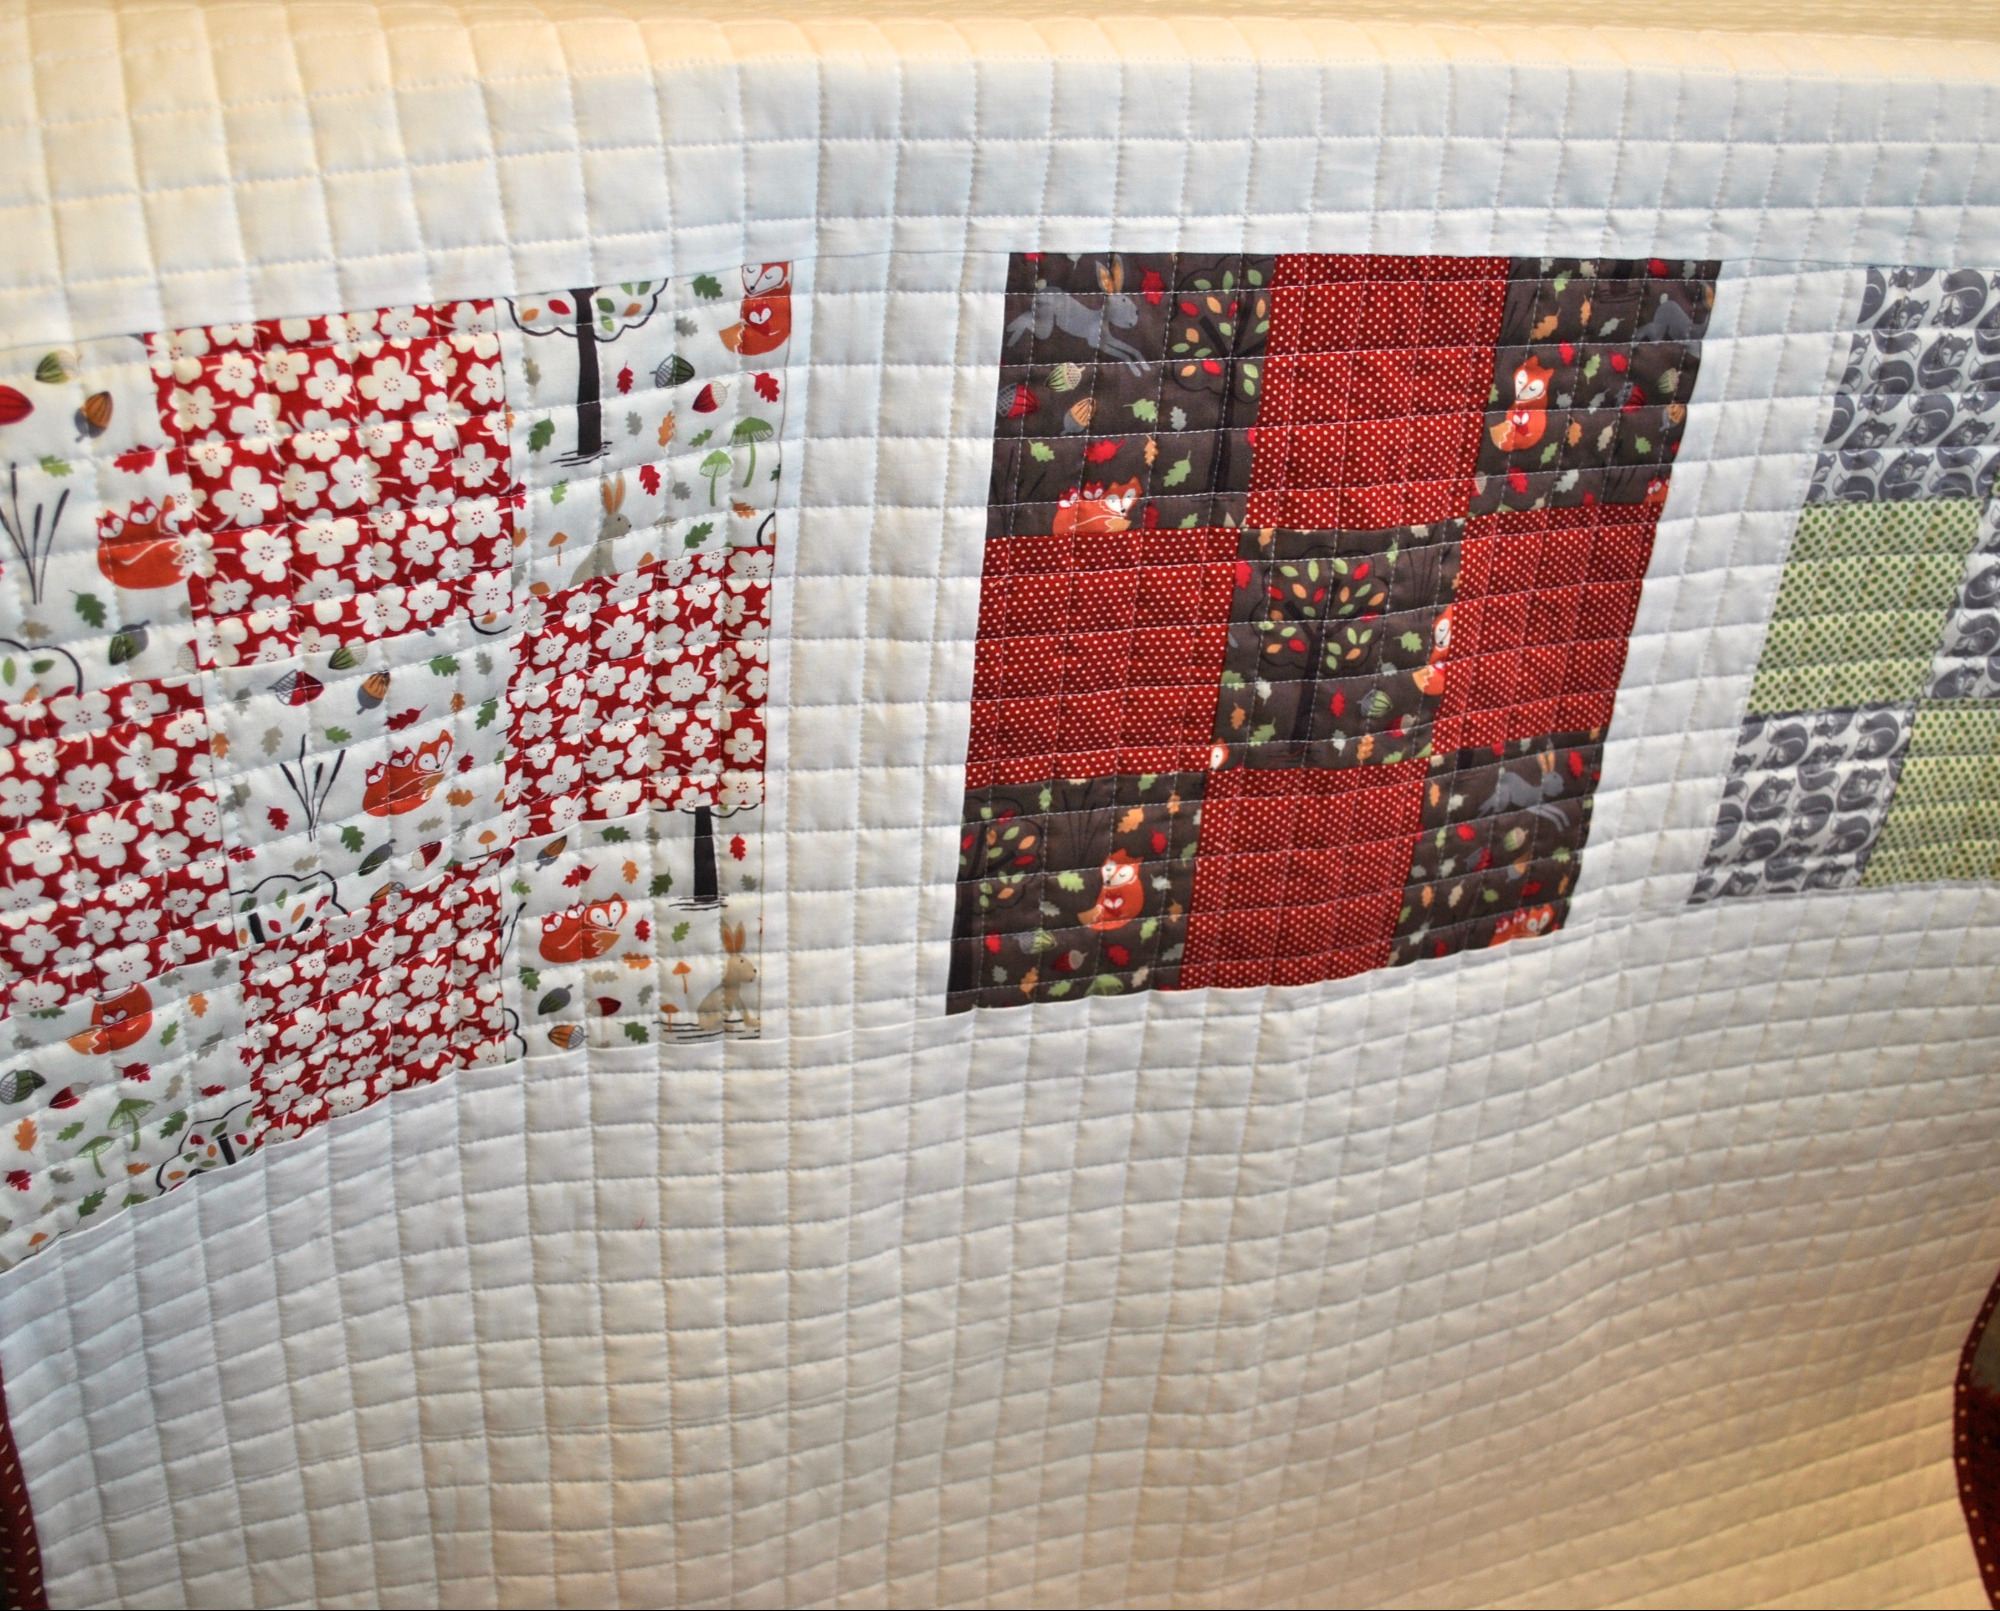
In another free pattern, Fox in the Nine Patch,
as you can see in the first photo above, I decided
to repeat the nine-patch block used on the front, but in a larger scale
on the back. As this diagram shows, by inserting the pieced panel horizontally rather than vertically, it meant I only needed 45" of base
fabric, plus left over fabric from the front. In this case I used long
and fat quarters from my stash to make the quilt, so it was easy to cut 3½" squares for these blocks.
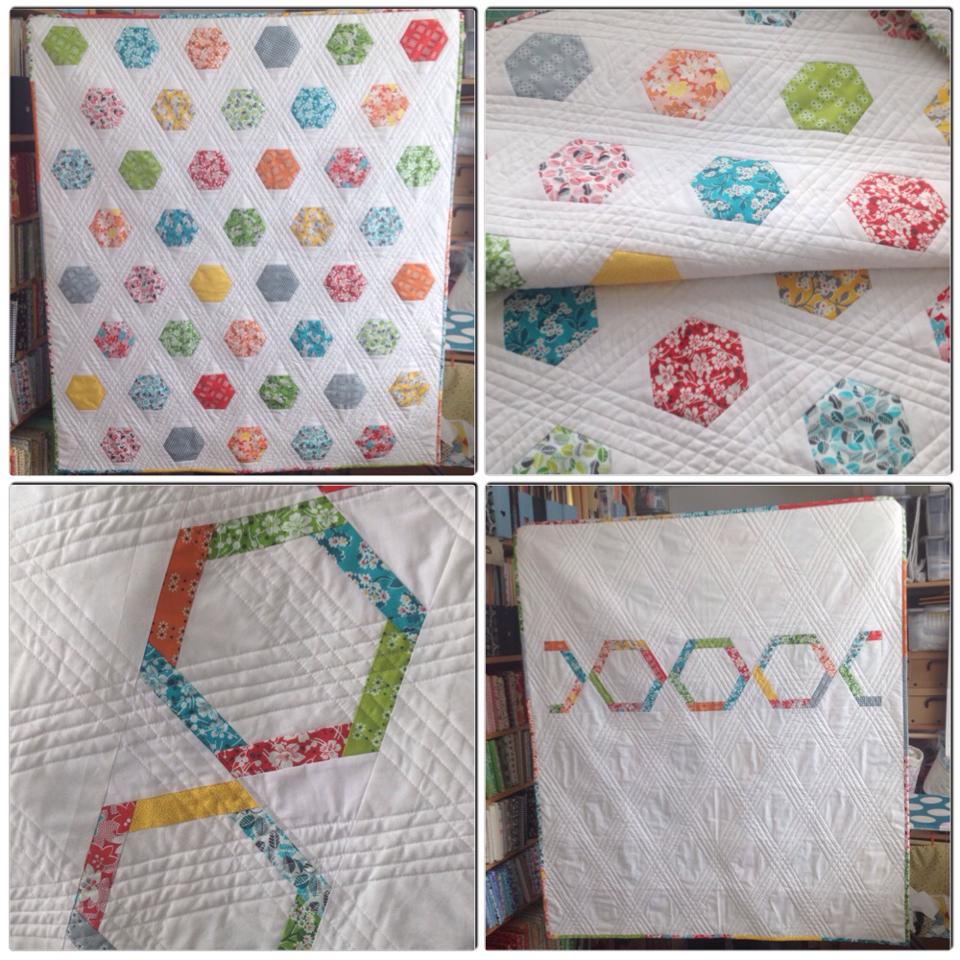
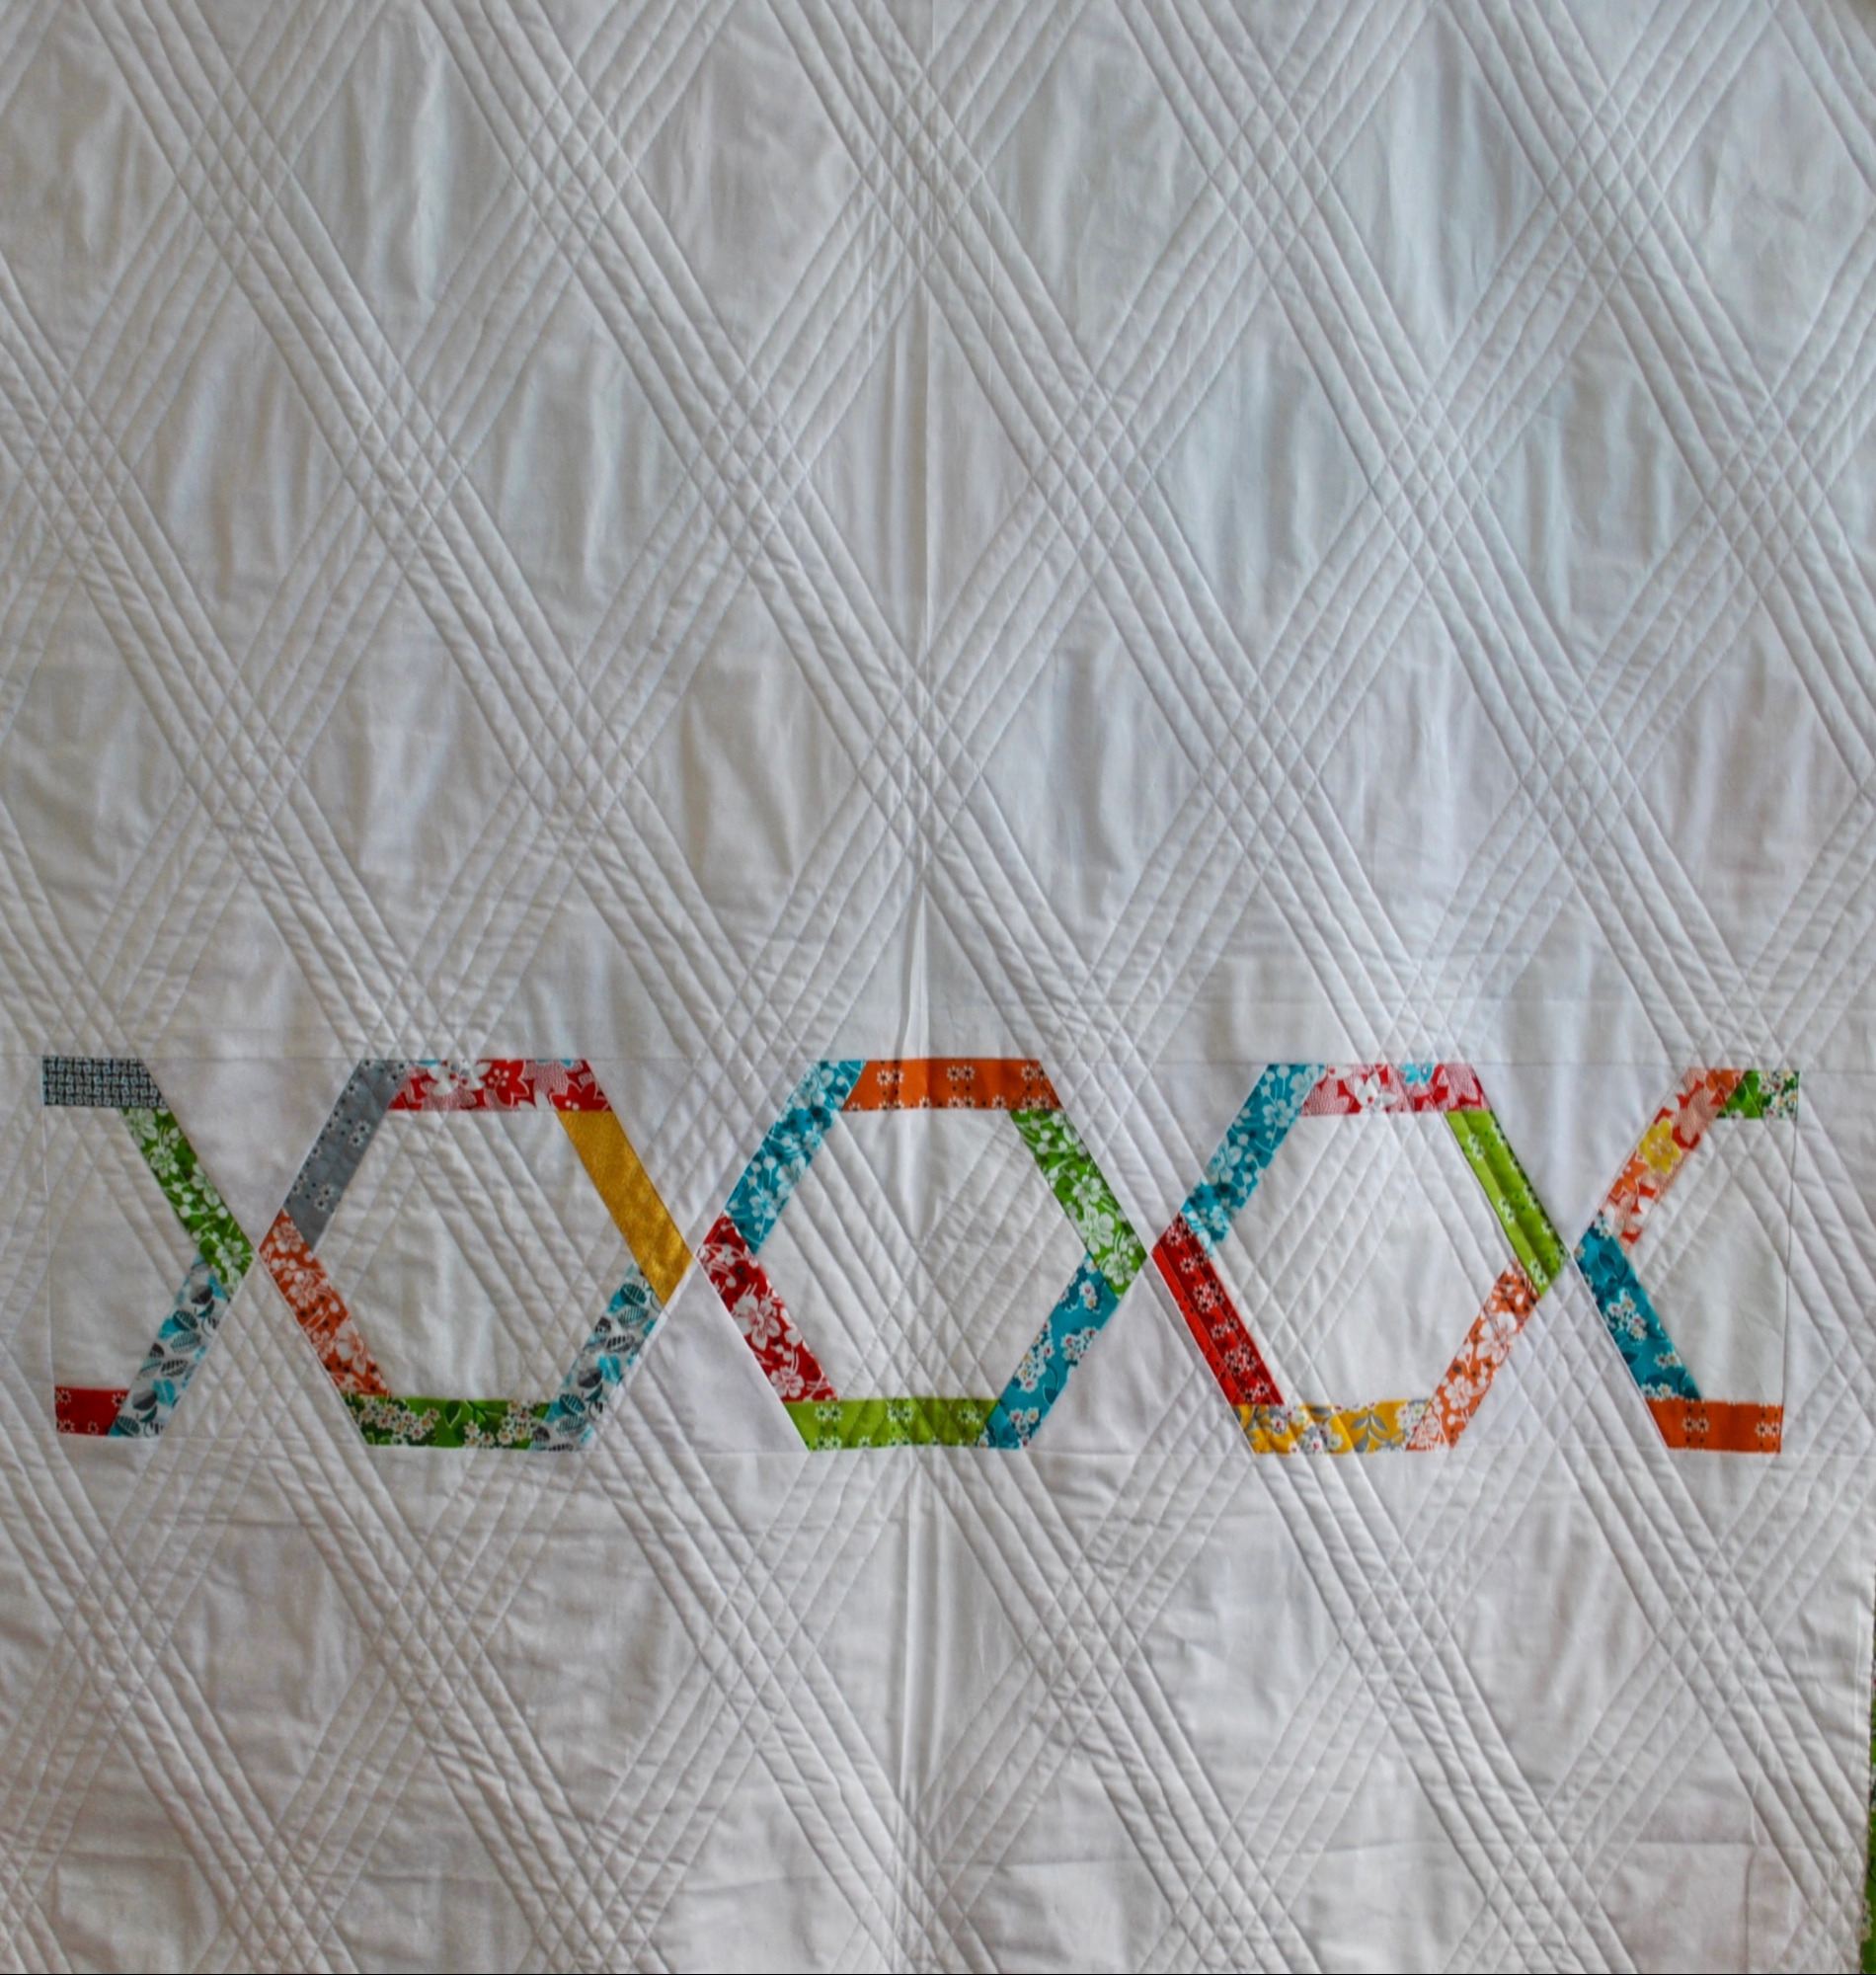
Sometimes when working on a back, I'm come up with a whole new design for a quilt, and I'm certainly going to make a one in this design one day... My Floating Lilies quilt features partially-sewn hexagons, which seemingly float in a sea of white. On the back, I decided to increase the block's scale again, but also reverse the piecing, so that patterned strips bordered a white hexagon. This is definitely one of my favourites!
So how do I work these measurements out I hear you ask... you just need a little maths, and some creativity...
- First write down the measurements of your quilt top, then add an extra 4" to the length and width - as you know, you need your wadding and backing to be larger than your quilt top for the quilting process - 2" all the way round is plenty.
- As I mentioned above, I insert the panel off to one side rather than down or across the centre. To do this I divide my base fabric roughly into thirds, I then cut off one third and place this piece to the right, and the two-thirds piece to the left, with the panel running down the middle. You can then work out the measurement of the panel you need to make up the shortfall.
- Going back to the All Squared Up quilt above, you can see that I had a 61" length of 44" wide white, which I split into one 30½" drop and one 12½. This meant I needed an 18" x 61" panel which I made up from left over 2½" strips.
- When you come to basting your quilt sandwich, fold your top in half and insert pins to mark the centre point of the top and bottom edges. Unfold and fold in half the other way, and insert two more pins to mark these centre points. Do the same with the quilt back.
- Now lay the back face down as straight as you can get it, then the wadding, and finally the top, lining up all those pins on the back with those on the front. This should ensure your panel is running straight down/across your quilt.